
Vinyl is one of the most popular and favorite options for flooring in modern homes, while being very durable, resistant, inexpensive, and easy to lay. Just like any other type of vinyl flooring dubai may be subject to defects.
The following is a simple step-by-step approach to how one can take on some of the most common vinyl flooring issues, saving you from really costly replacements:.
Scratches in Vinyl Flooring
Scratches are common, especially in high-traffic areas, though most are quite easily repaired with basic household items.

Removing Light Scratches:
Smoothing out the surface:
Gently clean the scratched surface with a soft cloth and mild soap to clear it of any remaining dirt on the surface and expose the area.
Use scratch remover:
Much home-improvement store carries scratch-removal products, or try color-matched wax crayon. Just rub the crayon into the scratch for an easy, quick fix.
Buff it Out:
Using the scratch remover or wax on the floor, gently buff the area with a soft cloth until the scratch has blended in with the rest of the floor.
For deeper scratches, you might have to use a vinyl floor repair kit. These kits will include fillers and color-matching options where you try to mask the scratch so that the appearance is smooth and seamless.
Getting Dents out of Vinyl Flooring
The dents mostly occur while heavy furniture sits on vinyl flooring for long periods. Dents are just a bother; fortunately, they are usually not difficult to fix.
How to Fix Dents:
Heat the Area:
Using a hair dryer, warm the dented area as heat makes vinyl more flexible. Hold the dryer a few inches away and run it in small circles across the indentation.
Iron Out the Dent:
Once heated, use your bare hands or a soft cloth to press and massage the dent out. The vinyl should start smoothing itself out naturally.
Let it Cool:
Once the dent is mostly gone, let the area cool down completely. Cooling will help the vinyl set back in its original place.
After that time, if the indentation is still visible, then take a heavy object and set it on top of it to further flatten it out for a day or two.
Peeling or Lifting Edges Repair
The peeling edges are some of the familiar problems of either older vinyl floors or those areas around much moisture. If left unattended, the peeling worsens with time and captures larger gaps or tears. Here’s a quick fix:
Steps to Fix Peeling Edges:
If you have numerous peeling edges, it may be well worth buying a small bottle of vinyl seam sealer. This is specialist for bonding vinyl and creates a watertight seal.
Clean Under the Lifted Edge:
In each case, use a clean dry cloth to wipe away dirt or other debris beneath your lifted edge. This will allow the adhesive to stick properly.
Apply Adhesive:
Place vinyl flooring adhesive or superglue on the back of the peeling section and glue it back into place. Carefully pry up the edge and spread a thin layer of glue, then press down firmly.
Weigh it down:
Take a heavy object-a pile of books is good-to put on top of the part that was glued for several hours while the adhesive sets.

Removing Vinyl Flooring Bubbles
Bubbles on vinyl floors are often a result of either air or moisture being trapped underneath the vinyl. Fortunately, this also can be fixed rather easily in most cases.
Steps to Remove Bubbles:
If the bubble won’t go away or the vinyl lifts again, consider adding a little more adhesive or using a vinyl roller to apply even pressure.
Pop the Bubble:
Take a sharp utility knife and make a small, light cut at the very center of the bubble. Try not to cut too deep.
Release the Air or Moisture:
Gently press down on the bubble to let the air or moisture out. Next, take a cloth and wipe away any of the moisture that may be there.
Weigh it Down:
Take something heavy to set atop for several hours, which ensures that the vinyl is bonded with the adhesive underneath and laid flat.
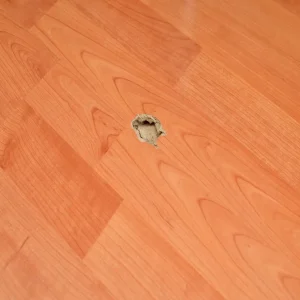
Re-mend Tears or Gouges
Tears and gouges tend to be more noticeable and look worse than scratches or dents. For a tear or gouge, you will need some little different approach; still, it’s manageable with the proper tools.
Repair Tears or Gouges:
It smooths rough edges: A utility knife will be used in trimming the jagged edges of the tear or gouge, which again facilitates the proper laying of a patch.
Patch:
Cut a piece of vinyl slightly larger than the area of damage from leftover vinyl from the original installation. Alternatively, one can buy a similar vinyl tile or plank and cut to size. Apply
Adhesive:
Apply a thin layer of adhesive under the patch, pressing down firmly. For the most part, match the grain or pattern of the patch with that of the surrounding flooring.
Smooth out the patch:
Use a roller or your hand to smooth the patch well so that it does not stick with gaps. Allow it to set for a few hours before anyone walks on it.
If it is a small tear, you might be able to fill it rather than use a patch with the aid of a vinyl floor repair kit.
Further Prevention of Damage
Once the repairs are done in your vinyl floor, a bit of maintenance can do much to avoid further damage. Here is how you can keep your floor looking good with a few easy tips:
Use Furniture Pads:
Place felt pads underneath the furniture’s legs, which will save them from dent marks and scratches. It’s pretty harmful to move furniture without these in the long run.
Clean Regularly:
The regular sweeping and occasional mopping with a mild cleaner will avoid dirt and grit that scratch the surface.
Avoid Stringent Cleaners:
Some of the vinyl-damaging chemicals may be utilized, so only pH-neutral or vinyl cleaners must be used.
Prevent High Heels and Sharp Objects:
High heels and sharp objects are other causes of gouges. Encourage family members or guests to take off shoes or install a mat near the door for catching grit and dirt.
Conclusion
Vinyl is a practical and cost-effective floor choice but does have its own share of TLC it requires from time to time. Whether scratches and dents, bubbles, or peeling-seemingly the most common vinyl flooring issues can be fixed with minimal tools and effort. With these simple steps and by taking just a few precautions, your vinyl flooring can look great for years to come.
A little maintenance and repair will go a long, long way toward keeping your floors looking fresh, without having to bear the expense of a total replacement.